
For my particular shot I've selected three images we'll be using in this tutorial: shot of some buildings, some sky, and of course some demolition in progress.
A long story short: we're going to mask out two buildings, prepare and map some destructions on those buildings, add some details like particles, and color correct everything at the end of the tutorial. Once you've downloaded the images, let's get started.
Step 1
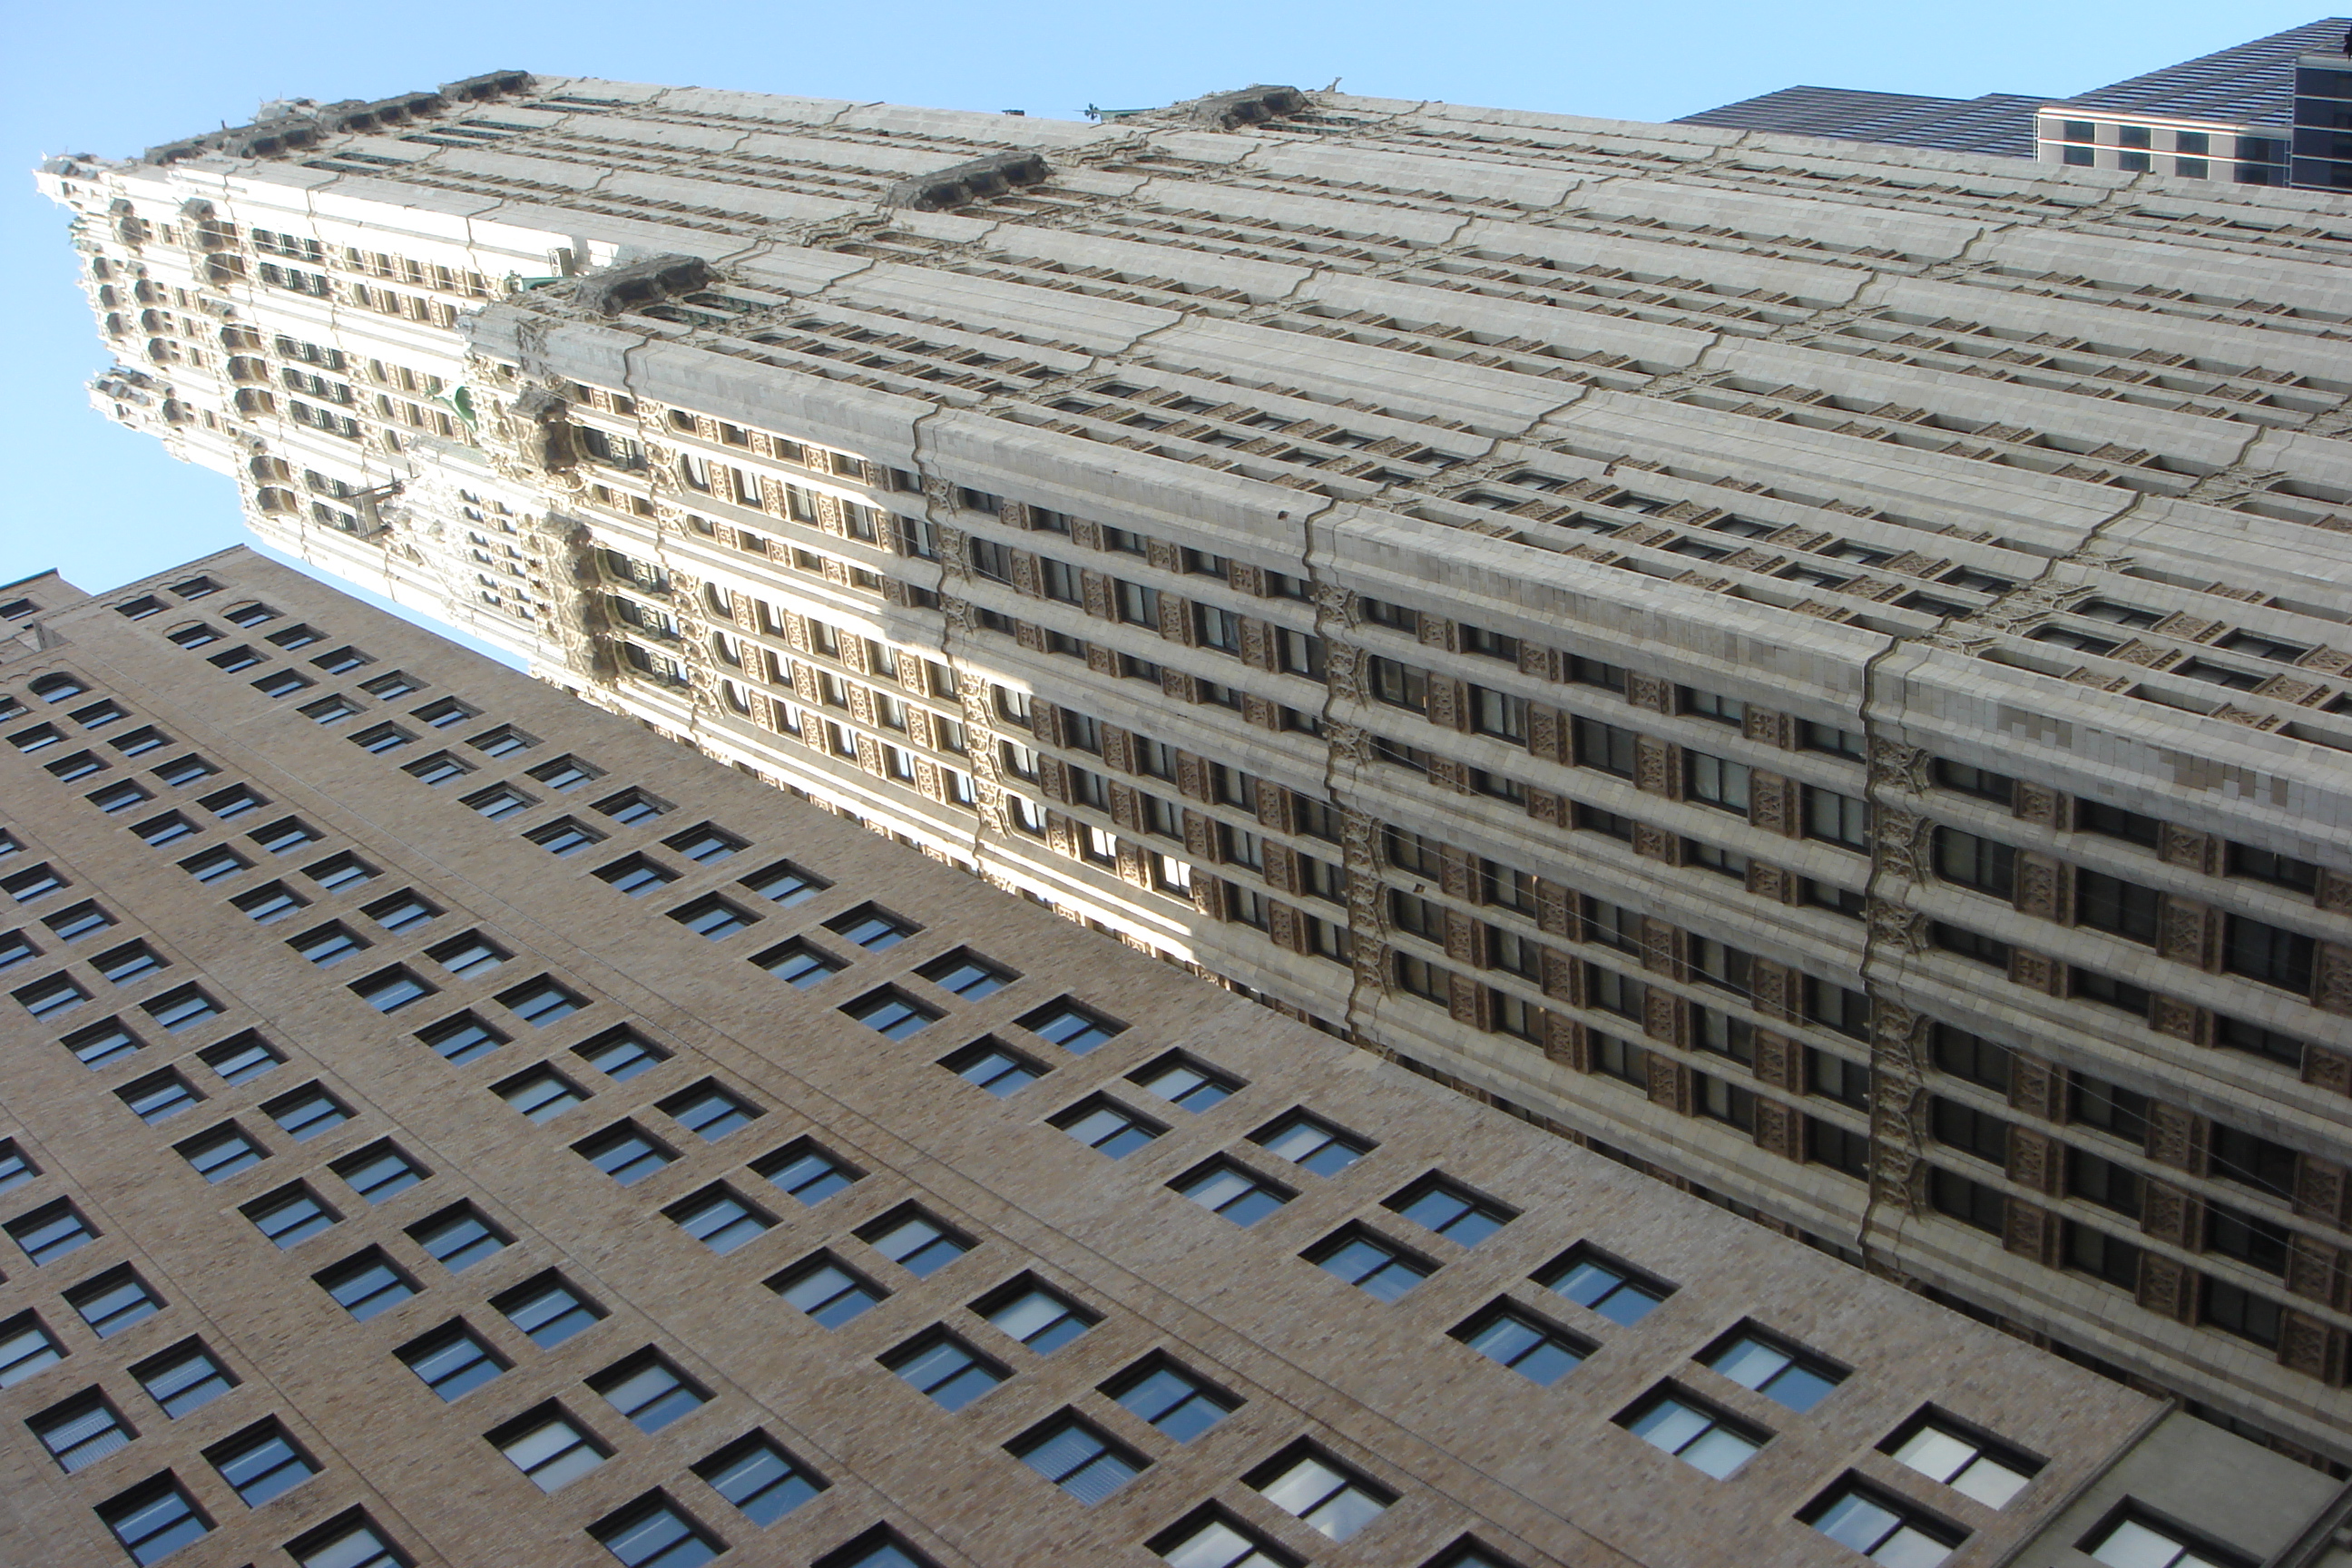
Our main image before modification.

Step 2
Double-click on "Background" layer to convert it into a regular layer (name optional). Create a new layer (Layer > New > Layer), and fill it with a vivid green color (Option + Delete when green is selected as a Foreground Color). Drag our freshly made green layer below our main image in the Layers Palette (F7).
Now some basic masking comes to action. let's create a mask for our "buildings" layer (Layer > Layer Mask > Reveal All). Everything OK? Cools! Let's move forward. So, duplicate our "buildings" layer (Command + J). The reason why I'm duplicating this layer is that we need those two buildings on two separate layers. This way later on we can move them around, link these two buildings together with additional textures, and quickly apply some color adjustments.
Now with a simple brush (with hard edges) and 100% black color in our Layer Mask, mask everything except the left building, and when done the right building on our layer copy. This way we have green background, masked image of the left building on a separate layer, and the right building on a separate layer.

Step 3
To make things easier later on let's create a Group (folder) and move our right building layer into it (Layer > New > Group).

Step 4
Same with the left building, move it into a Group.

Step 5
Create new layer (Layer > New > Layer). Then using the Line Tool (U), draw a few lines following the perspective of our buildings - for clarity we can use two different colors. Why we're drawing those lines? The reason why is that were going to map our destruction image onto those buildings and lines we just drew a second ago. It will be helpful when transforming the destruction images. Go ahead and Group these lines and name the grouped folder "Guidelines."

Step 6
Turn all the layers on. Also, I've changed our green color to 50% grey, as I'm done with masking at this point and don't need such a high contrast background.

Step 7
Open our "destruction image" and drag it into our project. Don't forget to save our main file. Just in case. You know that things can happen.

Step 8
Using the Rectangular Marquee Tool (M), I've selected the most interesting part of our "destruction image" Now we can Copy and Paste it to a New Layer.

Step 9
Scale down our selected fragment by using Edit > Transform > Scale (use Alt + Shift to scale proportionally from the center of transformation). Then hit Enter or double-click to confirm the transformation.
Now duplicate our selected fragment a few times to create a wall from it, which will require about four to five copies. Don't worry about the details for now, as this is a tutorial. Place the layers right next to each other without any gaps at the end. Select those layers we just created, and press Command + Shift + E to merge them into one layer.

Step 10
Copy our wall to a separate layer and transform it using Edit > Transform > Distort. By dragging corners try to match the perspective lines on our left building. I know it's tricky. Try it few times until you get it just right. Once you're done hit enter or double-click.

Step 11
In this Step you'll find out the reason why we've transformed a whole wall to match the left building's perspective. Now we can Mask and Unmask the destruction wherever we want to, without painting it here and there.
Let's create a mask on our transformed wall. Then using a simple brush mask/unmask destruction along the building. This way we have total freedom. In the meantime (once you're done with masking our destruction) you can mask some funky edges along the building to make it look damaged at the edges also, not only along the wall.

Step 12
Our "destruction wall" is too bright for our composition at this point. So, let's use Curves (Command + M) and and drag the middle point down a bit to make it darker. Nothing fancy - just darker.

Step 13
Now its time to do some destruction on our right building. Basically it's the same story as with our left building, but we have to transform our wall four times (two for upper part of the building and two for the lower part). Let's do it by going to Edit > Transform > Distort. Then Merge those four new layers into one layer.

Step 14
Same as before with masking, feel free to mask with different brushes and experiment until it looks right to you.

Step 15
Using Curves make it darker.

Step 16
Turn off our Guidelines, as there are just a few more steps to go!

Step 17
Copy both our Groups (Alt + Drag) and make them smaller using Transform > Scale.

Step 18
Turn on all groups and drag the smaller buildings behind other groups - to create depth.

Step 19
Using a simple brush let's draw some birds, as destruction always looks better with some creepy birds flying around. So, with a black Brush draw three birds on a new layer, which is more than enough for our needs.

Step 20
Now copy the "Birds" layers and transform it a few times by scaling and rotating. Then merge at the end. Those "Birds" layers should be dragged below our building groups also.

Step 21
Create a New Layer and fill it with a dark grey color. Use Filter > Render > Lens Flare to create an illusion of the sun up in the sky. Let's put the Screen Mode at 30% or so - beautiful!

Step 22
It's not necessary but I've painted some "Particles" on a new layer with grey and white elements - dots and thin lines. Blur those elements using Filter > Blur > Gaussian Blur, which adds some atmosphere into our image at the end.

Step 23
At this point I'm dragging my image of the sky right above the Background layer and below our buildings to create an illusion of a cloudy sky without painting it by hand.

Step 24
At the end its time for some color adjustments. Use Curves, Color Balance, Photo Filter, or Hue/Saturation to the point where you're satisfied with mood of your image.

Step 25
This is how it looks on my screen.
 Step 26
My brushes. I have bucket-loads of them.

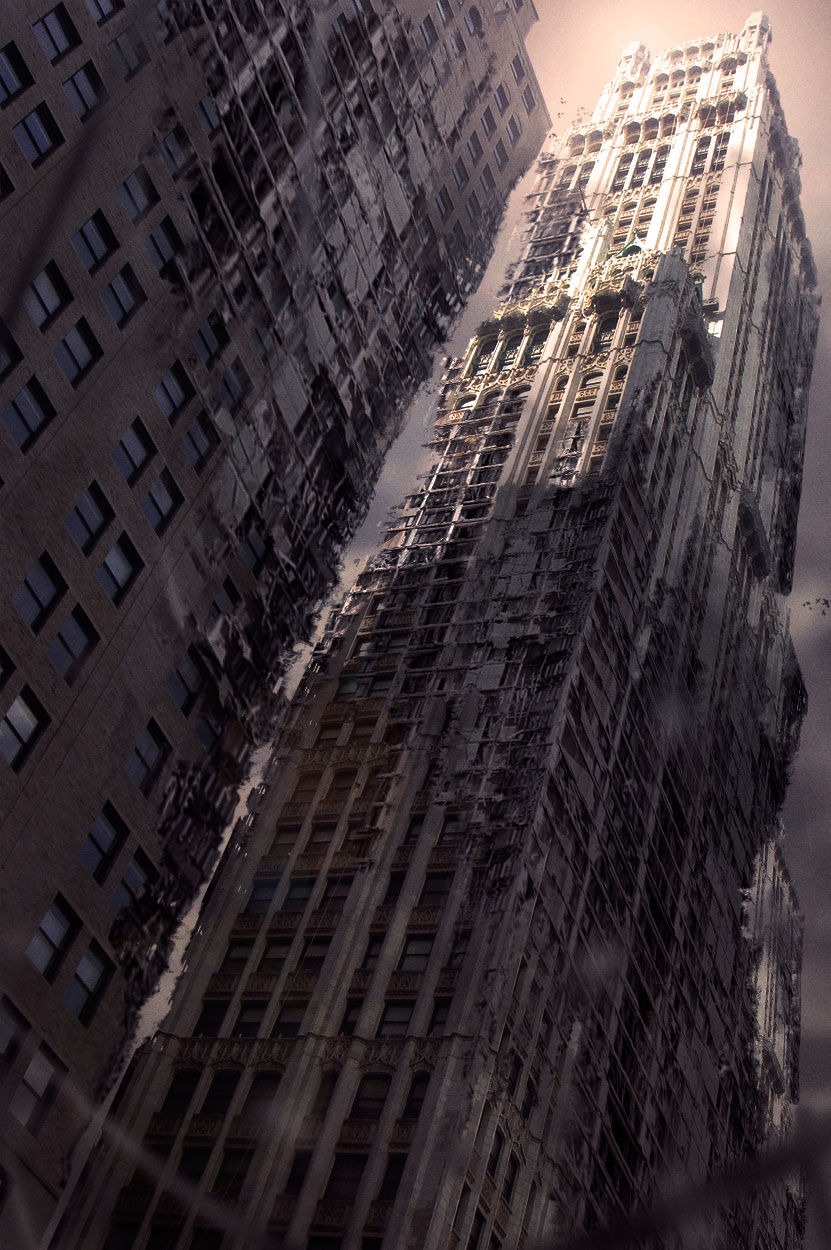
Final Image
The final image is below. You can view the large version here.
